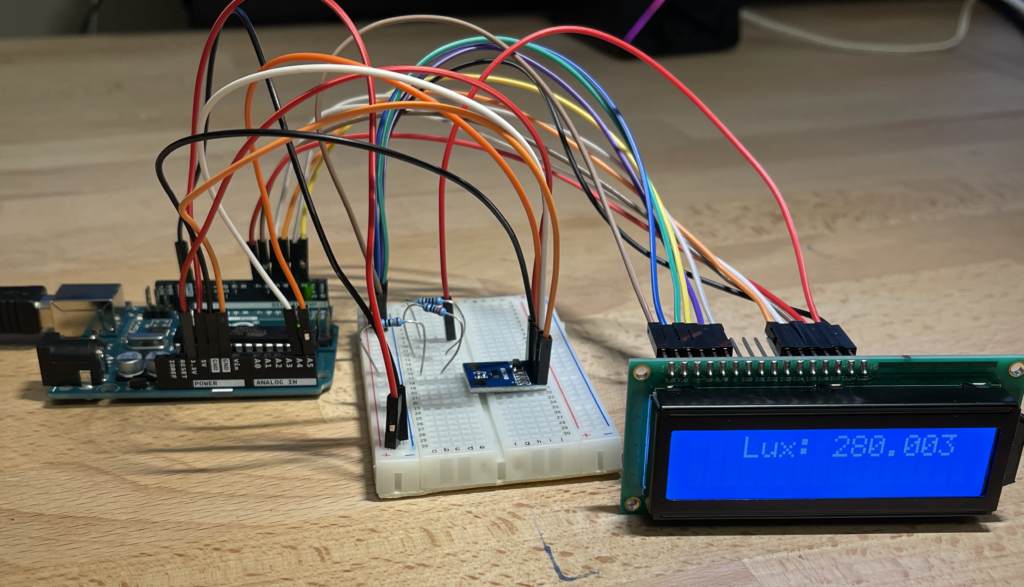
One of my goals over the Christmas Holidays was to learn more about Arduino to make an Arduino light meter for my spring science fair project.

I ordered the Arduino Starter Kit with the 170-page book with 15 starter projects. Over the holidays, I built the first 11 projects in the book, which helped me learn about electronic circuits and coding in the Arduino Integrated Environment (IDE)
For my science fair project, I needed a sensitive light meter. I first tried using the photo resistors and photodiodes included in the Arduino starter kit, but both were not sensitive enough for my science fair project. So I order the BH1750 light meter from Amazon.
The instructions for the BH1750 light meter are on the Arduino Project Hub, along with many other excellent projects.
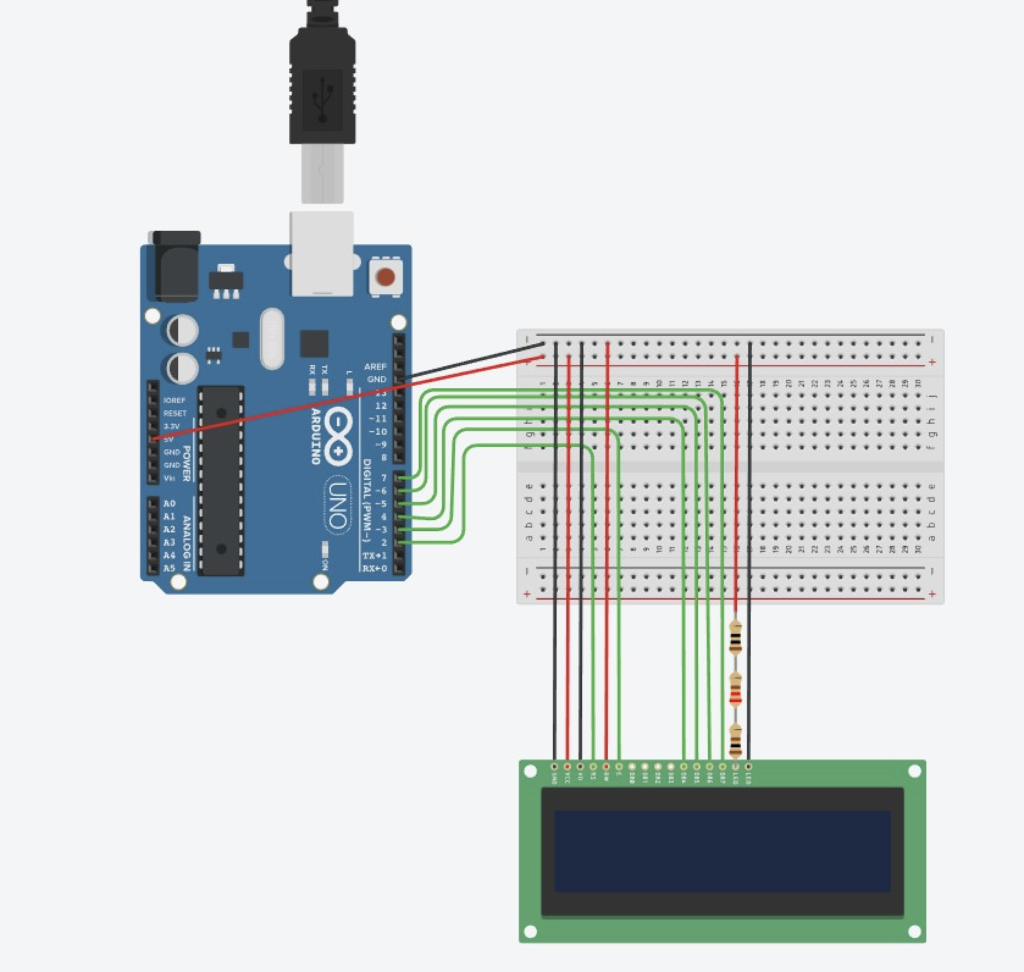
The code and schematic drawings for the BH1750 light meter on the Project Hub outputs the LUX measurements to the serial monitor, which was very helpful for my science fair project since I could record the LUX measurements over time.

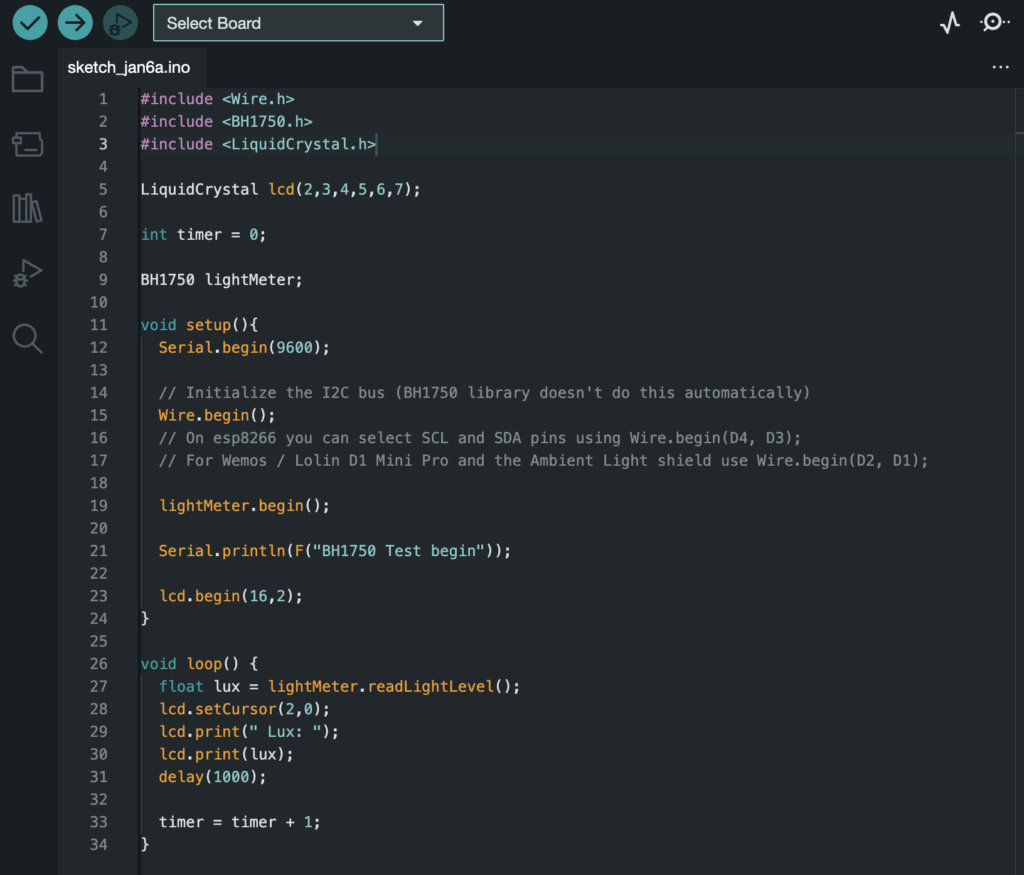
However, I also connected the light meter to the LCD included in the starter kit, which also worked well. Here is the code I used.

If you want to start with Arduino, I recommend Arduino Starter Kit and doing the beginner projects in the book.

